This tutorial explains how to use an Arduino board as an AVR ISP (in-system programmer). This allows you to use the board to burn the bootloader onto an AVR (e.g. the ATmega168 or ATmega328 used in Arduino). The code in this example is based on the mega-isp firmware by Randall Bohn.
NOTE: Currently, you cannot use an Arduino Uno as an ISP programmer because the optiboot bootloader does not support this sketch. A revision for this is in progress.
Instructions
To use your Arduino board to burn a bootloader onto an AVR, you need to follow a few simple steps.
- Upload the ArduinoISP firmware (in Examples) to your Arduino board.
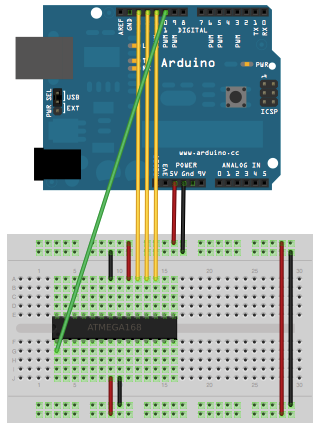
- Wire your Arduino board to the target as shown in the diagram below.
- Select the item in the Tools > Board menu that corresponds to the board on which you want to burn the bootloader (not the board that you’re using as the programmer). See the board descriptions on the environment page for details.
- Use the Burn Bootloader > Arduino as ISP command.
Circuit (targeting Arduino Duemilanove or Diecimila)
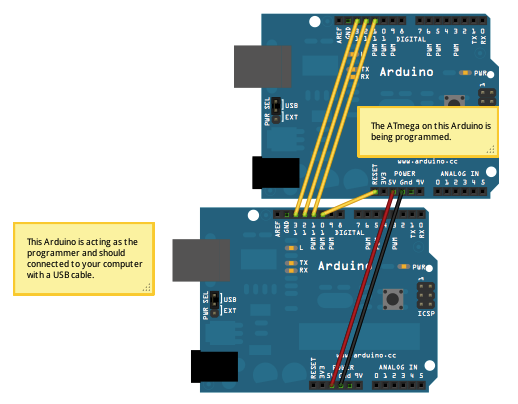
An Arduino board serving as an ISP to program the ATmega on another Arduino board. Note that you need access to the reset pin on the target board, which isn’t available on NG or older boards.
Circuit (targeting Arduino NG or older)
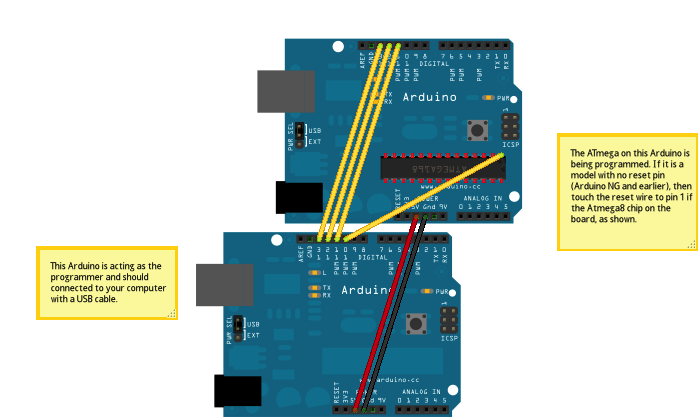
On NG or older boards, connect the reset wire to pin 1 of the Atmega chip on the board, as shown above.
Circuit (targeting an AVR on a breadboard)
See the Arduino to Breadboard tutorial for details.
 |
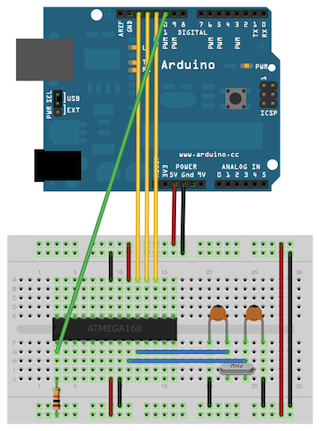 |
| Using an Arduino board to program an ATmega. Because no external clock source is connected, the ATmega must be configured to use its internal clock. | Using an Arduino board to program an ATmega, with external crystal and associated capacitors (18 or 22 picofarads). |


